
The Serious Freshening
Go to <Last, Summary, Next>Cooling—And Then ... It Leaks
 Lynn in Bugsby, September 5, 2005 |
Completed: 2006-07-16 — Started: 2006-07-15
 |
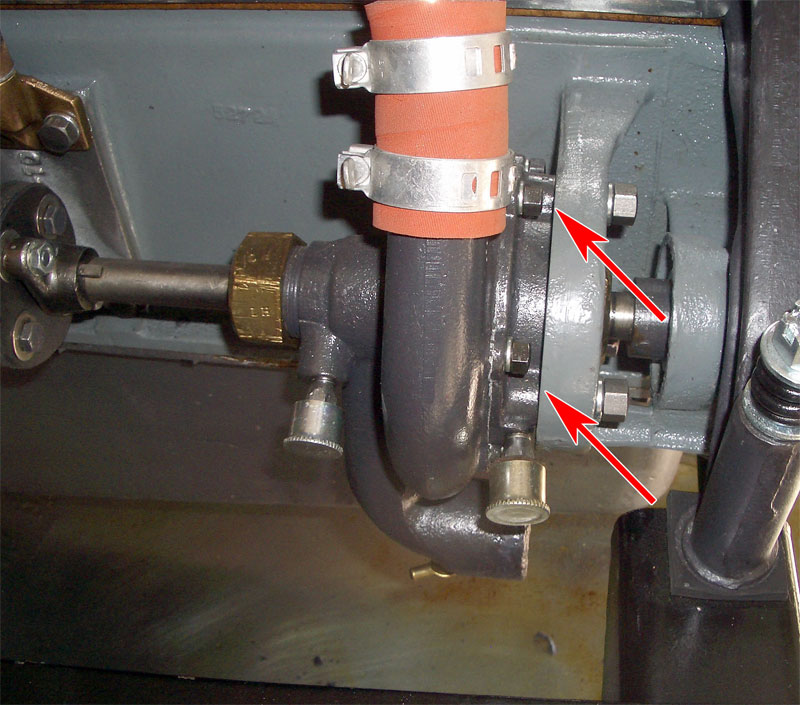 |
| LEAKS IN HEAD AND PUMP: Lynn did not think to seal the threads of holes that penetrate the water jacket when he assembles the engine. Water weeps past the threads on two bolts holding the Stewart vacuum fuel pump to the head (left) and the six bolts that hold the two halves of the water pump together (right). |
 |
 |
 |
 |
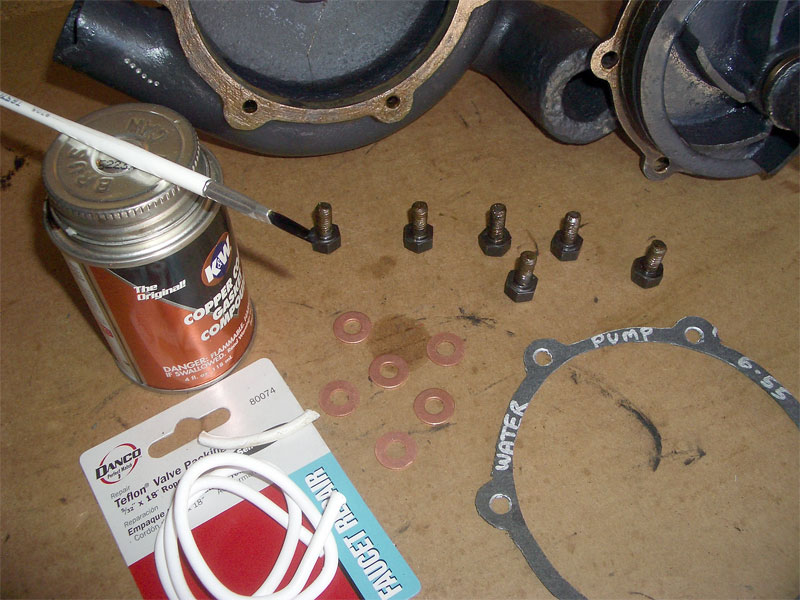 |
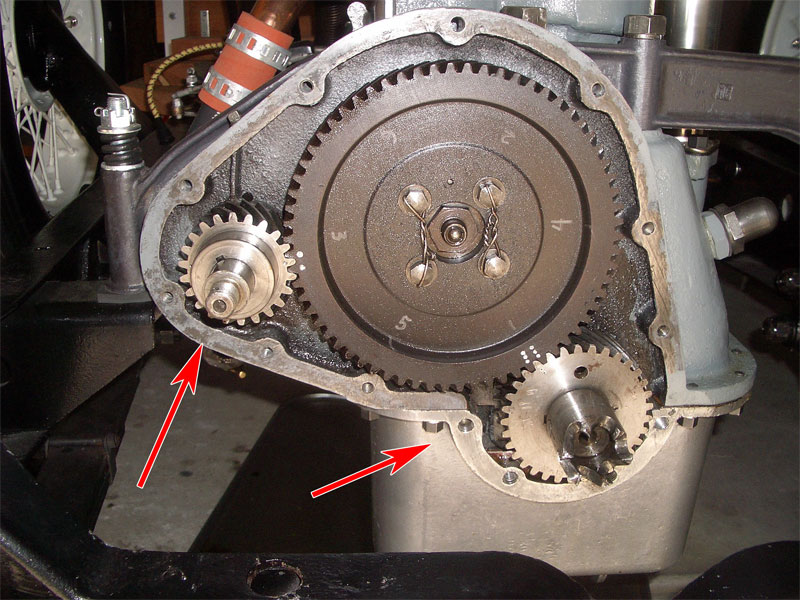
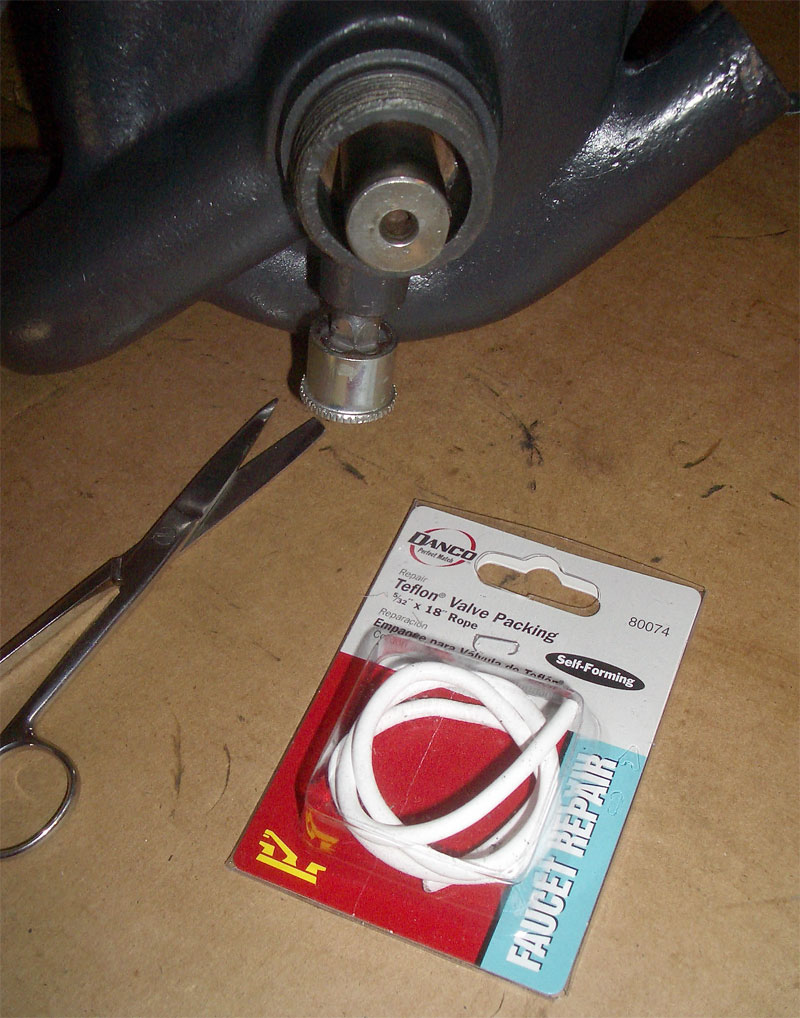
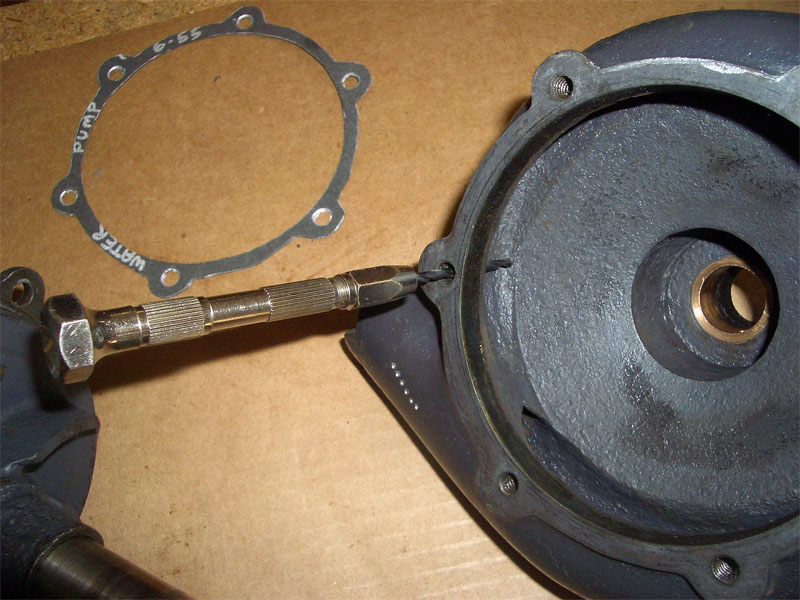
| FIXING THE PUMP LEAKS: Unfortunately fixing the weeping water pump requires pulling off the radiator and front gear cover to get access to the pump drive shaft (left two photos). Lynn uses "Copper Coat" liquid gasket compound to seal the threads on the weeping bolts. Lynn also uses 5/32" thick Teflon rope to repack the shaft seals on the water pump. |
Work Completed:
It came as something of a rude surprise to Lynn that Bugsby's engine has multiple coolant
leaks when he finally
starts the engine two days before
he's to leave for the
100 year anniversary celebration
of the Kissel Motor Car Company.
In multiple locations, bolt holes on the engine penetrate through to the water jacket in
the head and on the water pump.
Without taking steps to seal the threads on these holes, they weep coolant.
Fixing the weeping threads on the bolts holding the fuel pump to the head is a reasonably easy task. After draining some of the coolant to drop the level of the liquid below these holes, Lynn coats the threads with some "Copper Coat" liquid gasket and the problem is solved.
It's more difficult to fix the leaks in the water pump as it needs to be removed from the engine to access the problematic areas. To remove the water pump one needs to pop the front gear cover. These efforts takes Lynn two days to accomplish.
Lynn could not locate a 3/16" thickness of packing material for the shaft seals when he rebuilt the water pump. At that time he used two-thirds of the old seals and added some new 1/8" graphite coated cotton packing. While he wasn't totally satisfied with the job, Lynn hoped that it would be good enough.
While browsing the plumbing section of the local Orchard Hardware Supply, Lynn is pleased to spot some 5/32" thick Teflon packing material. He needs almost exactly 36" (two packages, one per seal) to pack the two shaft seals on the water pump.
Lynn has read somewhere that he should only tighten the packing gland nut enough to keep the seal from leaking. The seals appear to be holding after three separate tightenings of the nuts over a two week period. While Lynn hopes that the Teflon packing will be a good choice for the water pump shaft seals, it is too early to be confident that this will be a good long-term solution.
When Lynn reinstalled a new front gear cover gasket while reassembling the engine, he only uses "Copper Coat" liquid gasket to coat one side of the gasket, gluing it to the sheet metal cover plate. He did not apply a coat to the engine and oil-pan side of the gasket thinking that it would make later disassembly easier and that the gasket material should provide an adequate seal. This may turn out to be a mistake as oil is now slowly weeping past the front gear cover. As one can see by examining the second photo from the left, above, the front gear cover actually spans a funky joint between the block and the oil pan. Also the lower portion of this cover forms a catch basin for a pool of oil that lubricates the timing gears. While the leak is not bad, Lynn has the (foolish?) hope of stopping all fuel/oil/coolant leaks from Bugsby. Fixing this slow drip may require a third disassembly, sealing and reassembly of the front cover. Poop!
Work Remaining:
None.
Contact
 with your comments or questions
Copyright © 2018 Lynn Kissel
Last updated: May 24, 2009