
The Serious Freshening
Go to <Last, Summary, Next>Engine—Head Bolt Thread Insertss
 Lynn in Bugsby, September 5, 2005 |
Completed: 2006-09-15 — Started: 2006-09-17
 |
 |
 |
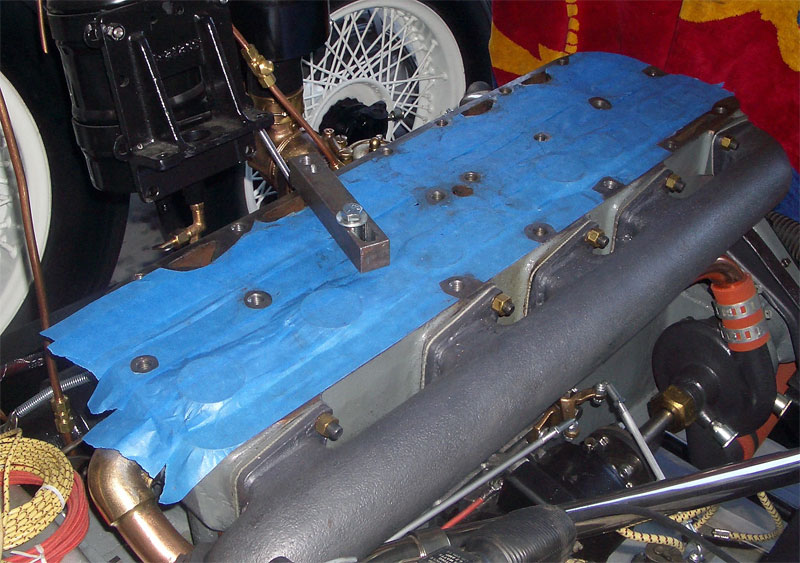
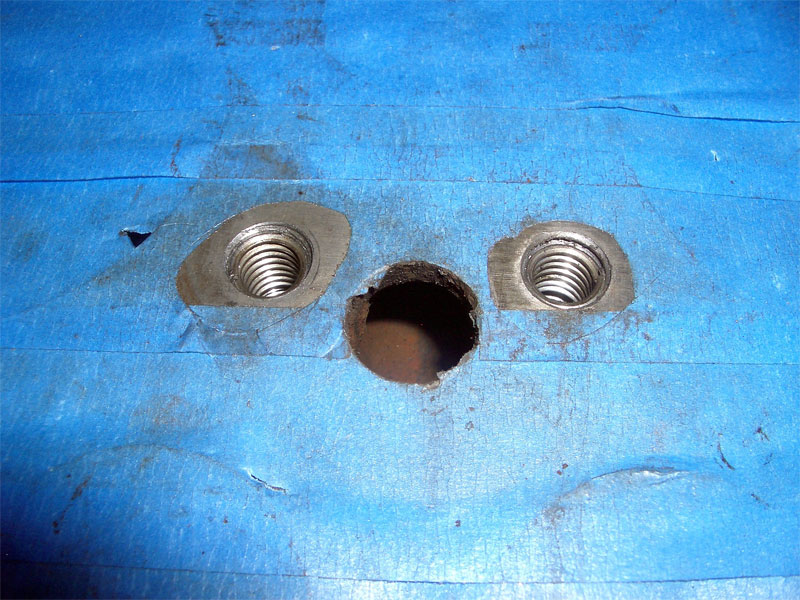
| REPLACE REMAINING THREADS: Using the tool that Dan made for him, Lynn installs thread inserts in all remaining head bolt holes. Lynn's map of the head shows where and when bolt thread inserts are installed (right). |
Work Completed:
In his push to assemble the engine for the
100 year anniversary celebration,
Lynn needs to replace the threads in the block for eight head bolts.
Including the six threads that had been installed by a previous owner, 14 of 22 threads in
the block have been replaced.
As Lynn retorques the head bolts in late August, 2006, an additional two bolts feel "soft." While he achieves the required torque (he's using 65 ft-lb for the 7/16"-14 head bolts), Lynn suspects that this will be a continuing battle until all the head bolt holes in the block have new hardened inserts.
Lynn sets aside a three-day window in September, 2006, to remove the head and carefully work through all 22 head bolt threads, assuring that they all have hardened inserts. He finds that some of the previously installed inserts have worked their way deep into the head so he also replaces these with new inserts installed to the correct depth.
He's also surprised to find that for some of the holes, a bolt will not thread down through the full length of the insert, but prematurely tightly binds in the hole. After some investigation, Lynn concludes that the outer threads have not been cut deep enrough. These are the oversized threads into which the insert itself is threaded. As a result, the bottom of the insert is pushed in towards the center of the hole and is too narrow to let the bolt pass freely. Lynn removes these inserts, cuts deeper threads and installs a new insert. In the end, Lynn winds up installing 15 new inserts.
Almost all of the bolt holes penetrate through to the water jacket. Lynn uses a round, pencil shaped magnet at the end of an inspection mirror to dip down into the water jacket and fish out the metal filings that are created. A couple of the holes penetrate through to the exhaust ports in the block. Lynn removes the exhaust manifold to vacuum out the metal filings created in these cases.
For a couple of holes (over the carburetor mounting/intake manifold, over some of the exhaust manifold ports) a 3" bolt is just a little too long. Lynn uses a drill to carefully deepen these selected holes about another 1/8" so that 3" bolts can be used in all holes. Lynn believes that bolts about 2-3/4" long would be the best length to use, if he can find them.
After a three-day effort, Lynn is satisfied that he has a block that will properly receive head bolts that can be safely tightened to an appropriate torque without stripping.
Work Remaining:
None.
Contact
 with your comments or questions
Copyright © 2018 Lynn Kissel
Last updated: May 24, 2009